Archive by Author

Blueberry Chia Pancakes…….oh yeah almond essence!

Blueberry Chia pancakes

So I’m at it again. My dear pregnant friend visiting from another island is here for a few days and of course she loves pancakes. So I decided Blueberry Chia Almond Essence pancakes were on the menu. It was, it did and it will always be heavenly!

Here’s all you do:

Blueberry Chia Pancakes

2 cups flour
2 Tbsp sugar
4 teaspoons baking powder
1/2 teaspoon baking soda
1/2 teaspoon salt
2 Tbsp chia seeds
4 eggs
1 3/4 cups almond milk (or whatever milk you choose)
1/4 cup melted butter, cooled
1 teaspoon almond essence
2 cups blueberriespcake
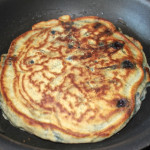
Sift together the flour, sugar, baking powder, baking soda, seeds and salt in a mixing bowl. Make a well in the center.

In a separate bowl, combine the milk, eggs, butter and almond essence. Add the milk mixture to the flour mixture and stir by hand until the batter is evenly moistened. (At this point, the batter can be covered and refrigerated for up to 12 hours, or used right away.)

Heat a large skillet over medium high heat and grease it lightly by brushing or spraying with oil. Right before you make the pancakes, fold the blueberry into the batter. Drop about 1/4 cup of pancake batter into the hot pan, spreading them slightly into circles. Leave about 2″ between pancakes.

Cook until small bubbles appear and the edges are set, about 2 minutes, then flip using an offset spatula. Cook on the second side an additional 2-3 minutes, or until the pancakes are golden brown. Serve at once with Maple Syrup and butter.

Bon Appétit!

Avocado Baked Eggs

Avacodo EggsLove eggs. Love avocados. Match almost made in heaven. Saw this from “The Wicked Noodle” blog (Darling blog by Kristy Bernardo do stop by and check her out….Darling) and had to give it a try. I didn’t have limes but thought the lemon might be a simple substitute. And of course the sriracha gives this such a wake up call. You must try!

Here’s all you do:

Ingredients

2 avocados

4 eggs

1/2 lime or lemon

kosher salt & freshly ground black pepper

assorted toppings of your choice

Instructions:  Preheat oven to 425˚. Split avocados in half and remove the pit. Gently scoop out some of the pulp to make the hole bigger to make more room for the egg. Place avocado halves on a baking sheet. Drizzle each with a little lime/lemon and season with kosher salt and a little freshly ground black pepper. Crack an egg in each hole, allowing some of the whites to run out (just make sure the yolk stays put). Bake for approximately 15 minutes or until whites are set and yolk is at desired consistency. Top with whatever is in the cupboard. I liked the lemons and the chives fresh from the garden. Happy Spring.

Bon Appétit.

Spinach Frittata

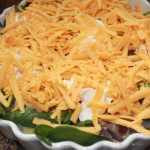
Spinach Frittata

I love spinach. Really love spinach. Wish I could say that I have loved it all my life long, but it’s one of those veggies that as an adult I can’t get enough of. Sadly it is also one of the most pesticide ridden veggies, but I have grown my own and it is easy and so much better from your own garden. Super easy to grow.

That being said I sometimes can’t eat it fast enough and find some additional uses in the not raw spinach category.  ;-) This frittata is super easy. Like a quiche with out all the work or clean up.

Here’s all you do:

Spinach Frittata:

6 eggs
1.2 cup of almond milk or regular (your choice)
2 healthy cups spinach washed and dried
1/2 teaspoon salt
1/4 teaspoon black pepper
one small onion sautéed
1/4 cup of sliced goat cheese
1/2 cup shredded cheddarRaw Spinach Frittata


Preheat oven to 350˚  Saute the onions in 1 tablespoon of coconut oil.

Let cool and place aside.

In a small bowl mix the eggs and milk, salt and pepper, set aside. When the onions have cooled,  place the spinach in a butter greased quiche pan and then top with the onions.

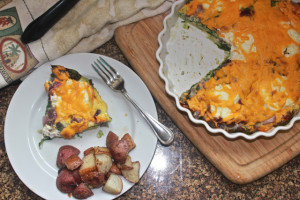
Lastly pour over the mixed eggs on top of the spinach and onion base. Top with dopples of the goat cheese and then top with the cheddar. Bake for 35-40 minutes or until the eggs set. I cover the top with foil until the last 10 minutes.


Cut spinach Fritata

Bon Appétit!

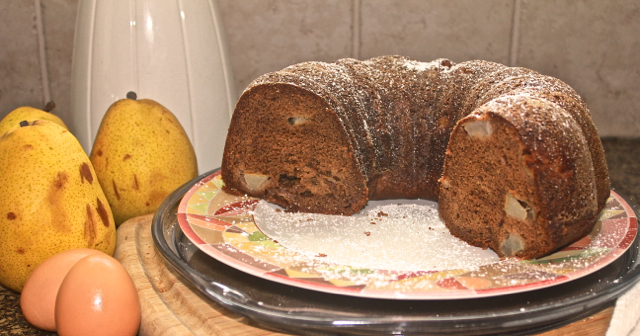
Pear Cake Update…..still delicious!

Pear Cake Update

I was making my wonderful pear cake again when all of a sudden I thought “Why don’t I use almond extract instead of vanilla extract?” Oh, why had I not thought of that sooner. So while I added this in only at the second hour, so to speak, exchanged one teaspoon of vanilla for one healthy teaspoon of almond extract. Next time I will cut out the vanilla altogether. But for now this, as always, smells ridiculously heavenly. Ha, wish you were here!

Here’s all you do:

The Pear Cake:

Ingredients:

3 Cups All Purpose Flour

1 Cup Light Brown Sugar

1 Cup Granulated Sugar

1½ Teaspoon Baking Soda
½ Teaspoon Salt
½ Teaspoon Ground Cloves
½ Teaspoon Ground Nutmeg
2 Teaspoons Ground Cinnamon
¼ Cup Molasses

2 Teaspoons Almond Extract ;-)

1 Cup Vegetable Oil

3 Large Eggs
3 Cups Diced Pear

The Glaze:
½ Cup Unsalted Butter, melted
¼ Cup Water or Apple Juice
1 Cup Confectioner Sugar
½ Tablespoon Ground Cinnamon

Preheat oven to 350˚. Thoroughly grease a large bundt pan.

In a large mixing bowl, sift together flour, baking soda, salt, cloves, nutmeg, cinnamon, and granulated sugar. Mix in brown sugar, breaking up any clumps. Create a well in the center of the dry ingredients and mix in oil, eggs, vanilla extract and molasses. The batter will be quite thick. Fold in the diced pears being careful to not break up the fruit too much.

Spoon the cake batter into the greased bundt pan and spread the mixture evenly. Bake for approximately 1 hour or until a tooth pick inserted in the center comes out clean. Let cool in pan for 20 minutes before inverting on to a plate.

This cake needs no glaze just giggles. It’s simply delicious without anything but a little sprinkle of powdered sugar and good friends! Simple Sundays!

Bon Appétit!

Rachel rocks it……..with 6 daughters!

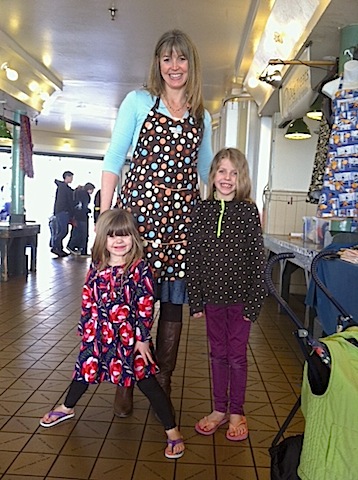
A bright light on a Seattle afternoon! My new customer Rachel at the end of the day with two of her gorgeous daughters.

A picture is worth a thousand words! Come join us at Pike Place and Gig Harbor (starting in May).

Rachel

Chanteuse Designs……..Often imitated, never duplicated  ;-)


My Kind of Flash Mob……..!

Ahhh the human spirit! Enjoy. ;-)


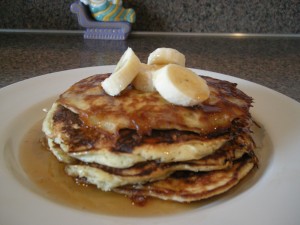
Banana Chia Pancakes with Almond Milk

Banana Pancakes

Banana Chia Pancakes


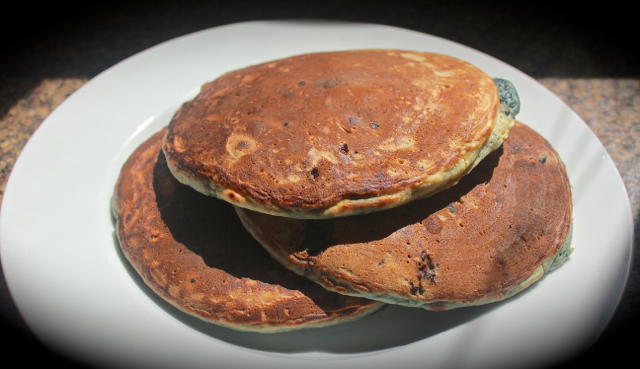
STILL The best banana pancake recipe I have found in a long time. I just decided to try to make these more healthy. It worked like a charm. Didn’t miss the buttermilk, hence I cut back the sugar amount. I want to cut it out altogether next time as the Pure Maple syrup I use is plenty sweet enough. And we all know I have a salt craving over sugar! So I may not be the person to ask, but these were utterly delicious.

Here’s all you do:

Banana Chia Pancakes


Makes 4-8 servings

  • 2 cups all purpose flour
  • 2 tbsp sugar
  • 4 tsp baking powder
  • 1/2 tsp baking soda
  • 1/2 tsp salt
  • 1 3/4 cups almond milk, unsweetened
  • 4 large eggs
  • 1/4 cup butter, melted and cooled
  • 1 1/2 cups mashed ripe bananas [I used 2]
  • 1 Tbsp Chia Seeds

Coconut oil for the pan.
Sift together the flour, sugar, baking powder, baking soda, and salt in a mixing bowl. Make a well in the center.

In a separate bowl, combine the milk, eggs, and butter. Mash the bananas separately. Add the milk mixture to the flour mixture and stir by hand until the batter is evenly moistened, then fold in bananas. (At this point, the batter can be covered and refrigerated for up to 12 hours, or used right away.)

Heat a large skillet over medium high heat and grease it lightly by brushing or spraying with oil. Right before you make the pancakes, fold the mashed bananas into the batter. Drop about 1/4 cup of pancake batter into the hot pan, spreading them slightly into circles. Leave about 2″ between pancakes.

Cook until small bubbles appear and the edges are set, about 2 minutes, then flip using an offset spatula. Cook on the second side an additional 2-3 minutes, or until the pancakes are golden brown. Serve at once with Maple Syrup and butter.

Bon Appétit!
Almond, Date Granola Bars…….aka Wambold Bars.

I have a wonderful friend that I work with who has cut out dairy, meat and sugar from his diet. When I baked him a cake he couldn’t eat it. Hmmm, plan B. So I was searching…… thinking maybe Granola Bars would make a nice thank you treat. Something fun, easy, light, filling and healthy. I searched and searched since I had never made them before and this was what I landed on. Thank you Little Monster Baby blog for the template for these. I added some additional ingredients. Believe I accidentally added too much honey, so these were sooooo sticky they nearly killed my Cuisinart. Yes, it survived but it is not happy with me at all. Next time I will pull a Lucille Ball. Yuck Yuck.

These turned out delicious buuuuuuuuut I needed (for me personally) more nuts, less honey, and definitely more sesame seeds. Probably in that order. The cashews were perfect in these. Perfect. And maybe a new Cuisinart.  I think mine is a dinosaur. A great Dinosaur but still a dinosaur! It barely survived these.

Here’s all you do:

Almond Date Granola Bars   aka WAMBOLD BARS

  • 1 cup quick oats
  • 1 1/2 cup slivered raw almonds
  • 1 cup dates
  • 3/4 cups honey
  • 1 tablespoon peanut butter
  • 1/2 teaspoon cinnamon
  • 1/2 teaspoon vanilla
  • 1/4 teaspoon salt
  • 1 cup cashews whole or pieces (but not ground)
  • 1 Tbsp Flax Seeds
  • 1 Tbsp sesame seeds

Preheat oven 350 degrees.

In a food processor, pulverize oats and 1 cup of the raw almonds to the consistency of bread crumbs. Then, add dates remaining ingredients and blend until sticky and incorporated. Spill mixture out onto a board and fold in remaining 1/2 cup of almonds.

Add this mixture to a parchment lined small baking dish (3 cup / 4 1/2″ x 6 1/2″), and bake for 25-30 minutes. Remove from dish, sprinkle with more and more sesame seeds and cut into squares. Fabulous with a cup of coffee and great friends!

Bon Appétit.

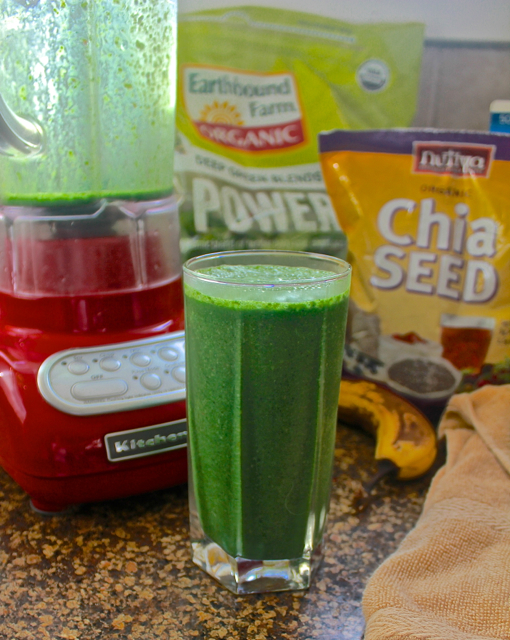
My Mean Green Figthing Machine…..Smoothie ;-)

Green Drink

This is just in time for St. Patrick’s Day. My power drink. Super easy, yummy and will ward off any little devils heading your health way.

Takes less than 5 minutes and is super filling if you are on the run.

Here’s all you do:

Ingredients:
  • 1 frozen ripe banana
  • 1 healthy cup fresh kale or spinach
  • ¾ cup vanilla almond milk (or any non dairy milk preferably unsweetened)
  • 1 tablespoon hemp seeds/Chia Seeds
  • 1 teaspoon Spirulina (optional)
  • 1 teaspoon Flax Seed Oil (optional)

Add all ingredients to a blender. Blend on high for 1-2 minutes or until super smooth. You may need to add in additional almond milk or water to form the consistency right for you. Drink with joy!

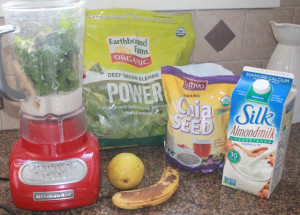
Green ingredients


Bon Appétit.

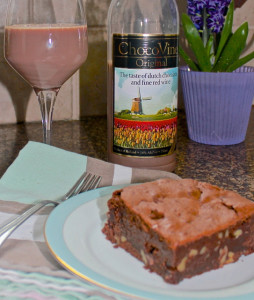
Triple Dark Chocolate Whole Grain Brownies and the snowfall

chocolate

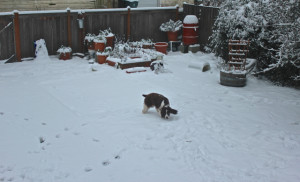
It was a day for “death by chocolate” and these don’t come along too often. We were busy making, baking, and taking photos of the gorgeous snowfall that finally came (and went) this weekend. Absolutely gorgeous. So of course, brownies came to mind. I was short on unsweetened chocolate cocoa powder and long on unsweetened chocolate bars, so I found this perfect recipe. The only thing it didn’t have was walnuts. I added them and this was a wonderfully yummy treat with some hot cocoa and great friends! What a great day. Woof!

Here’s all you do:

Triple Dark Chocolate Whole Grain Brownies

Recipe by: Fork Knife Swoon Yield: 16 Brownies

Ingredients

1/4 cup unsweetened cocoa powder*

1/4 cup boiling water

1/2 cup (1 stick) unsalted butter, cut into tablespoons

2 oz unsweetened chocolate (100% cacao), finely chopped

1-1/2 tsp instant espresso powder

2 tbsp vegetable oil

1-1/2 tsp pure vanilla extract

1-1/4 cups granulated sugar

1/4 cup light brown sugar

2 large eggs + 1 egg yolk

3/4 cups whole-grain spelt flour (or sub whole-wheat flour)

1/2 tsp sea salt

1/3 cup bittersweet or semi-sweet chocolate chips

Instructions:

Preheat the oven to 350 degrees F. Line an 8×8 inch metal or oven-proof glass pan with parchment paper, leaving a few inches of overlap on each side. Butter the parchment paper and two remaining sides of the pan, and set aside. In a large mixing bowl, add the boiling water to the cocoa powder, and whisk until smooth and completely combined. Set aside. Place the butter, chopped chocolate, and espresso powder in a heat-proof mixing bowl. Using a double-boiler, melt the mixture together.

Add the melted butter/chocolate mixture to the cocoa mixture, and whisk to combine. Add the vegetable oil and vanilla extract and continue whisking. Add both sugars and whisk until smooth. Add the eggs and yolk, one at a time, whisking thoroughly between each, until the chocolate mixture is completely smooth and creamy. Using a spatula, gently fold in the flour and salt. Stir until combined, but be careful not to over-mix. Fold in the chocolate chips, then pour into the prepared pan. Smooth out the top with a spatula. Bake for 30 to 35 minutes (mine took about 44), until a cake-tester inserted into the middle of the brownies comes out with few crumbs attached. Cool on a baking rack for at least an hour before removing from the pan or cutting into bars.

Snowy Feb 2014

Bon Appétit.

Angels, Angel Food Cake and the passing of a loved one.

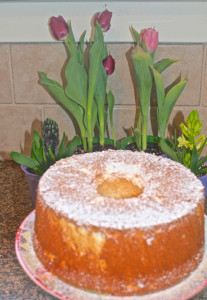
Angel Food Cake

It is often said when we lose a loved one that He or She has gone to a better place. We can reason all we like, but we will miss them. And a piece of our own heart feels broken and missing for quite some time.

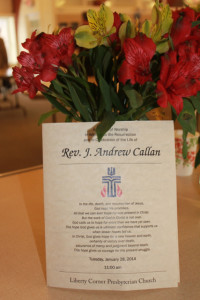
This post is to Honor my beloved nephew Andrew who passed quite unexpectedly on January 23, 2014. He was a living Angel. He was perfect. No, truly. He was. Don’t believe me? Ask ANYONE who knew him. He was more than a nephew, he was my good friend and confidant.

My other living angel is my good friend Vicki who jumped right in to take care of my boys. NO Easy feat, they can be a hand full! She’s an Angel. The comedy of errors upon leaving would make a great scene in a movie. But for now, I wanted to bake her an angel food cake. Seemed appropriate for this grey and wet and sad January, which has so quickly turned into February.

I snagged this easy and delightful recipe from American Heritage Cooking. Beautiful site, and great photos. (Unlike my photos….I don’t have the time and I am never ashamed to admit it! You should see the valentines aprons I knocked out today…..darling!) So bear with my photos, and trust me that this is one safe angel food recipe if you are new to angel food. Angelic!

Here’s all you do:

ANGEL FOOD CAKE

Ingredients

  • 1 cup cake flour
  • 1 ½ cups powdered sugar
  • 1 ½ cups egg whites (about 9-12 eggs)
  • 1 ½ teaspoons cream of tartar
  • 1 cup granulated sugar
  • ¼ teaspoon salt
  • 1 ½ teaspoons vanilla (high quality)
  • ½ teaspoon almond extract (high quality)
  1. About an hour before starting the cake, separate your egg whites from yolks. Cover the yolks with water and refrigerate for a later use. In measuring cup or small bowl let the egg whites warm to room temperature.
  2. Preheat oven to 375° and set rack to middle shelf.
  3. Sift flour and powdered sugar together 4 times and set aside. Yes, at least 4 times.
  4. Measure out all other ingredients to have them ready for cakes that require precise timing.
  5. Beat egg whites with cream of tartar in the bowl of a stand or hand mixer until foamy and cream of tartar has distributed evenly through out whites.
  6. Beat in sugar 2 tablespoons at a time, on high speed, until stiff and glossy. Add the extracts and salt with the last addition of sugar. Mine were slightly less stiff that true stiff peaks and the cake still turned out fabulous so don’t be too worried but ideally you should have true stiff peaks.
  7. Remove bowl from stand mixer and sprinkle flour-sugar mixture, ¼ cup at a time, over the meringue, folding it just until the flour-sugar mixture disappears.
  8. Push batter into an ungreased tube pan, 10×4 inches. Cut gently through batter with a metal spatula or gently tap on counter to settle batter.
  9. Bake until cracks feel dry and top springs back when touched lightly, 30 to 35 minutes.
  10. Invert pan on bottle and cool completely.
  11. To remove cake from pan, gently insert a flat metal icing spatula against the sides and carefully cut all the way around. You can use a small thin knife or a cake tester to cut around the middle tube. Gently flip cake over on a cooking rack, remove the pan and place the cake right side up with your hands. It should feel as light as air!
  12. Serve with powdered sugar, strawberries, blueberries or a light whip cream. YUM!

Here is a Blueberry Topping:

Ingredients

  • 2 cups fresh or frozen blueberries
  • 1 teaspoon fresh lemon zest
  • 2 teaspoons fresh lemon juice
  • 2 tablespoons granulated sugar
  • ½ cup water
  • ½ teaspoon cornstarch mixed with 2 teaspoons water
  1. Combine all ingredients except cornstarch mixture in a small sauce pot. Bring to a boil, uncovered, over medium heat. Reduce heat to a simmer and cook for 5-10 minutes.
  2. Add cornstarch and water mixture and stir until the cornstarch is completely incorporated.
  3. Continue to simmer for 10 minutes. The sauce will continue to thicken as it cools.

Andrew Eulogy

I can only imagine heaven is an even brighter place now.

Red Cabbage Slaw with an Asian Dressing

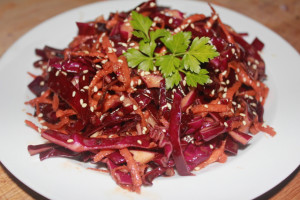
Red Cabbage Asian

I bought some red cabbage. It’s the season, right? So, now what do I do with it? And eventually I found something. I wanted “raw” and really healthy good for you. Needed to be yummy too, without indulgent ingredients.  There were plenty over cooked and full of decadent cheeses and nuts recipes, etc out there ……..but you get the idea.

Now when I say good for you, this is. When I say yummy, I always mean it. This, no yummy. This, good for you. Definitely on the diet for healthy and low fat. It’s Good for you. And this is definitely better after marinating the day after. 10 minutes did nothing for my tastebuds, but for lunch the next day I couldn’t get enough of it. It was good…….FOR you!! ;-)

Here’s all you do:

Ingredients:  

For the slaw

  • 2 cups red cabbage, shredded
  • 2 carrots, grated (about 1 cup)
  • 3 green onions, sliced
  • small handful cilantro
  • For the dressing-
  • 1 tbsp sesame oil
  • 1 tbsp grapeseed oil (or olive oil)
  • 2 tbsp soy sauce
  • 1 tbsp rice vinegar
  • 2 tsp honey
  • 1 tsp fresh ginger – grated
  • 1 tbsp lime juice (or lemon)

Instructions

  1. In a large salad bowl, combine the red cabbage, carrot, and green onion.
  2. In a small bowl, whisk together the ingredients for the dressing. Then add to salad bowl and toss with veggies. Let sit for 10 minutes.
  3. When ready to serve, use your hands to roughly tear up the cilantro leaves and mix in with the slaw. And as you can see I added the sesame seeds. :-)

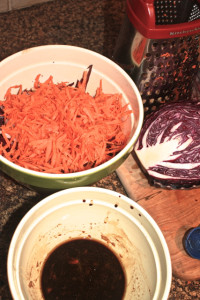
Cabbage fixings

Bon Appétit.

Pecan Sour Cream Coffee Cake with Orange Glaze……;-)

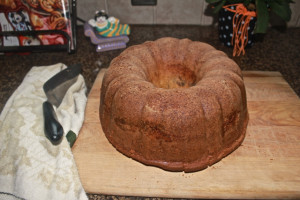
Pumpkin Cake

I had purchased some sour cream (for something…..?),  forgot I even had it and then decided a coffee cake would be the perfect use for it.  I wanted to give a friend who’s mother passed away a little gift to cheer him up and I decided this would be a great gift. Noting like something sweet for your sorrows!

What could be better than cinnamon, sour cream, pecans and orange glaze? Honestly, sign me up. And so I did. I grabbed this little ditty from Kristines Kitchen Blog and then doctored it a tad bit. When I saw the minimal amount of streusel, I had to alter it a bit. I will let you use your discretion.  Since I am a huge fan of Lisa Dupar’s sour cream cake (found here on my blog) her streusel is killer and I opted for grandiose!

AND I confess, we dove into this so quickly, never got a chance to make the glaze or take pictures. But Trust me, this is a keeper recipe.

Look out 6am core class, here we come!!

Pecan-Sour Cream Coffee Cake with Orange Glaze

Makes 12 to 16 servings

Ingredients:

For the streusel:

  • 1 tbsp. all-purpose flour
  • 3 tbsp. dark brown sugar (I added 1/2 cup sugar as well)
  • 1 tsp. ground cinnamon (I added 1 tbs.)
  • 1/2 cup pecans, toasted, cooled, and ground fine* (one cup chopped-period – don’t you be messing with my peCANS!! – old “When Harry Met Sally”…..you still with me? ;-)

For the cake:

  • 16 tbsp. (2 sticks) unsalted butter, at room temperature and cut into 1/2-inch pieces
  • 6 large eggs
  • 1 3/4 cups sour cream
  • 1/4 cup pure maple syrup
  • 1 1/2 tbsp. vanilla extract (skipped this accidentally, didn’t miss it however)
  • 3 cups all-purpose flour
  • 1 1/4 cups (8 3/4 ounces) granulated sugar
  • 1 1/2 tbsp. baking powder (this cake rose VERY high)
  • 1 1/4 tsp. baking soda
  • 1 tsp. salt
  • 1/2 cup pecans, toasted, cooled, and ground fine

For the glaze:

  • 1 cup (4 ounces) confectioners’ sugar, sifted
  • Zest of one orange
  • 2 tbsp. freshly squeezed orange juice

Directions:

  1. Make the streusel: Combine the flour, dark brown sugar, cinnamon, and pecans in a small bowl and set aside.
  2. Make the cake: Adjust an oven rack to the lowest position and heat the oven to 350 degrees F. Spray a 12-cup nonstick Bundt pan with cooking spray or grease with softened butter.
  3. Whisk the eggs, sour cream, maple syrup, and vanilla together in a medium bowl.
  4. Using an electric mixer fitted with the paddle attachment, mix the flour, sugar, baking powder, baking soda, salt and pecans until combined. Add the butter pieces and half of the egg mixture and carefully beat on low speed until the mixture begins to come together, about 15 seconds. Scrape down the sides of the bowl, add the remaining egg mixture, and beat on medium speed until the batter is light and fluffy, about 2 minutes (scrape down the sides of the bowl again as needed).
  5. Pour 5 cups of the batter into the prepared pan, using a rubber spatula to smooth the surface. Sprinkle the streusel evenly over the batter and then cover with the remaining batter, spreading it evenly.
  6. Bake until a toothpick inserted into the middle comes out with just a few crumbs attached, about 50-60 minutes. Cool the cake in the pan on a wire rack for 30 minutes, then carefully invert the cake onto the wire rack to cool completely, about 1 hour.
  7. Make the glaze: Whisk the confectioners’ sugar, orange zest, and orange juice together in a medium bowl. Using a fork or small whisk, drizzle the glaze over the cake. Enjoy!

Bon Appétit!

Pumpkin Pancakes are so yummy!!

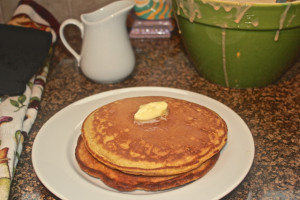
Pumpkin Pancakes...

I rarely make pancakes, but I made a pumpkin bread this week and had some puree left over.  Thought a great idea would be pumpkin pancakes. I found this recipe online and doctored it a bit and was NOT disappointed. As a matter of fact, I am craving them again this morning. Didn’t get the photos in before we devoured them but I promise to be making these throughout this new year. Since I changed some of the ingredients these were probably heavier than originally intended for pancakes, (had egg whites and I was being lazy about whipping them, etc) so if you are looking for light and fluffy, this would not be the recipe for you. We LOVED them. It made 5 large ones, and it was perfect for two with a hearty appetite.

Serve with butter and warm syrup! Enjoy!

Pumpkin Pancakes

Ingredients

  • 1 cup whole wheat flour
  • 2 ts baking powder
  • ¼ ts salt
  • ½ ts cinnamon
  • 1 ts pumpkin pie spice
  • 1 cup almond milk (I used what I had-1/2 h&h & 1/2 milk)
  • 2 eggs
  • ¼ cup pumpkin puree
  • 2 Tb maple syrup
  • 2 ts vanilla
  • 2 ts coconut oil
Directions
  1. In a medium bowl, combine the flour, baking powder, salt, cinnamon, and pumpkin pie spice and set aside.
  2. In a separate bowl, combine the milk, eggs, pumpkin puree, syrup, coconut oil, and vanilla.
  3. Add the wet ingredients mix until combined, taking care not to over mix.
  4. Cook on a griddle or in a pan over medium high heat.
  5. Top with maple syrup and chopped pecans or walnuts, if desired.
adapted from Skinnytaste
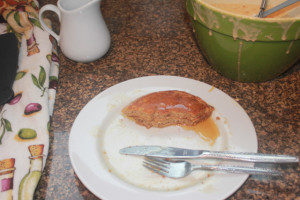
eaten pancakes pumpkin
Bon Appétit!

HAPPY THANKSGIVING everyone.

May your day be filled with much to be thankful for.

Bon Appétit.

Follow

Get every new post on this blog delivered to your Inbox.

Join other followers: