Archive | Recipe RSS feed for this section

Lemon Loaf………what were they thinking???? Repeat….were they thinking?

Hi Folks. I was soooo in the mood to put a smile on my friends face after a trying time of her mother falling quite ill. Nothing knocks the wind out of you more than losing a parent. So I wanted Sunshine goodies to put the wind back in her sails. This recipe totally fell flat. I have made some WONDERFUL lemon loafs, but this isn’t one of them. The nerve putting it on Tastespotting, getting plugged (tastespotting has never liked any of my posts……..yes I am laughing about it) and then finding out it’s ……a BIT dry?????

As you all may know, icing and I are not close. We never have been. Unless it has cream cheese in it, barely noticeable amounts of icing or glaze is about all I can tolerate. Besides, who wants to be a diabetic at an early age? Not to mention, I really really really really like my teeth. Did I mention I REALLY like my teeth? When I see icing my teeth shiver! I swear.

So, back to that lemon loaf. By the time it was Sifted, sifted, sifted …..did I mention I sifted everything??……… popped into the oven, and had cleaned up the dishes; THEN I read the small print which said it was a bit dry. HUH??? Hence they had accompanied this with a lemon glaze (oh goodie more sugar) and icing. Besides, where is the lemon juice??? OK, I am on a rant but whatever you do DON’T waste your time on this recipe! Unless you like icing. ;-)

All I am saying! My friends said it was lovely but that was only because I smothered it in ice cream! I did run some glaze through it (with half the sugar suggested – gee what a surprise huh?) but it was still DRY!!!!!!!!!!!!!!!!!!!!!!!!!

All I’m saying.

Lemon Loaf Cake 

4 large eggs, at room temperature
1 1/3 cups sugar
Pinch of salt
Grated zest of 3 large lemons
1 3/4 cups cake flour
1/2 teaspoon baking powder
1/2 cup heavy cream, at room temperature
5 1/2 tablespoons unsalted butter, melted and cooled to room temperature

Position a rack in the center of the oven and preheat the oven to 350F.  Butter a 9- by 5- inch loaf pan and dust with flour, shaking out the excess.

Working in a large bowl, whisk together the eggs, sugar, and salt for just a minute, until foamy and smoothly blended; the mixture should not thicken.  Whisk in the grated zest.

Spoon the flour and baking powder into a sifter and sift about a third of the dry ingredients over the foamy egg mixture.  Whisk the flour into the eggs, mixing lightly – there’s no need to beat.  Sift the flour over the eggs in two more additions and whisk only until everything is incorporated.  Whisk the heavy cream into the mixture.  Switch to a rubber spatula and gently and quickly fold in the melted butter.

Pour and scrape the batter into the prepared pan – it will level itself – and bake for 50 to 60 minutes, or until the center of the cake crowns and cracks and a toothpick inserted in the center comes out clean.  Remove the cake to a cooling rack to rest for 10 minutes before unmolding.  Cool to room temperature right side up on the rack. 

See what I mean? ;-)

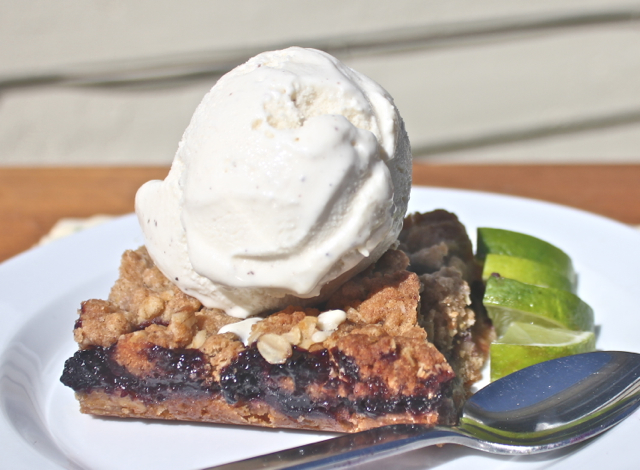
Blueberry Cobbler…..a definite keeper!

I am on the hunt for a really good cobbler. And I don’t seem to have one. So, I went and found something that looked promising. Of course I think that a good cobbler should have oatmeal. I want something with that Grape Nuts guy standing behind it……ya know what I mean? My experience with cobblers is that they were too dough-muddy dumplingy like and you were eating a pie that lost the state pie competition and was taking it out on us humble dessert eaters! Hence, if you come over for cobbler at my house, you can expect a granola, earthy, happy and healthy cobbler.

I used blueberry this time but will be making this with blackberry and peaches soon. I found the amount of sugar mixed into the blueberry was over kill. I would half that, maybe even be ultra healthy and nix it all together next time. Will keep you posted! I loved this cobbler. FINALLY!!!!

Here’s all you do:

Blueberry Cobbler Bars

1 cup light brown sugar

1 teaspoon baking powder

2 cups all-purpose flour

1 cup oatmeal

2 tsp. cinnamon, nutmeg, anise, or combination thereof

1 cup cold unsalted butter (melted mine)

1 egg

1/4 teaspoon kosher salt

4 cups fresh blueberries

1/2 cup white sugar (Too much 1/4 next time)

1 tablespoon cornstarch

Preheat the oven to 375 degrees F. Grease a 9×13 inch pan.

In a stand mixer, stir together the brown sugar, flour, and baking powder. Mix in salt and spices. Add butter and egg and mix on a medium speed until the dough becomes crumbly. Pat half of dough into the prepared pan.

Bake for roughly five minutes. Remove the pan and allow to cool slightly.

In another bowl, stir together the white sugar and cornstarch. Gently mix in the blueberries. Sprinkle the blueberry mixture evenly over the semi baked crust. Crumble remaining cobbler dough over top.

Bake for 45 minutes, or until top is slightly brown. Allow to cool slightly before cutting into squares. Serve with ice cream or naked!

Bon Appétit!

Naan bread recipe…..definitely not what I am looking for, but not bad.

So there I am searching for that easy, airy, stretchy naan bread that I have in my favorite Indian restaurant. But alas, still haven’t hit the jackpot. This recipe was really delicious, but I am looking for the texture mentioned above! It was yummy for sure. Would go great with stews and could make great pita bread sandwiches. But, still on the search for something up a notch!!

Here’s all you do:

Naan in the bread machine

Directions:

  1. In the mixing bowl of your bread machine, combine warm milk (about 80F) with yeast, butter and half of the sugar- set aside for 5 minutes.
  2. On a piece of waxed paper sift together flour, salt and baking powder.
  3. Add to bread machine bowl.
  4. Add olive oil, second half of sugar, yogurt and egg.
  5. Set the bread machine to the dough setting and let it run through the cycle.
  6. When the bread machine has almost finished the dough cycle, pre-heat your oven to 500˚.
  7. If you have a baking stone, place it in the top rack of the oven to preheat as well.
  8. Take dough out and separate it into six equal sections. (I got 8)
  9. Using a rolling pin or your hands, flatten dough out to ovals about 1/3 inch thick.
  10. When oven has pre-heated, place rounds on pre-heated stone or heavy baking sheet.
  11. Bake on top shelf of the oven for 90 seconds; the naan should start to puff.
  12. Switch the oven from bake to broil for an additional minute or until the top starts to brown.
  13. When brown on top, remove from oven and cover with a towel while you finish baking the remaining loaves.
  14. You can brush the naan with butter before serving if desired.

Read more: http://www.food.com/recipe/bread-machine-naan-98512#ixzz1rV5tNoPV

Bon Appétit!

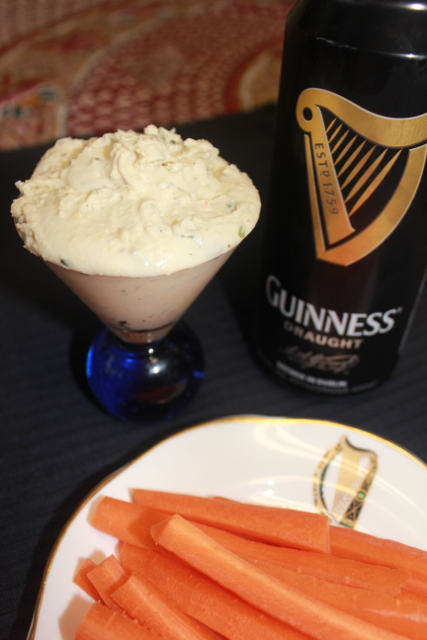
THE Guinness Dip…….shhhhhhh……..it’s sooo good!

There is nothing more to say than…..YUM!!! So masculine, so hearty, so rich so………..Shhhhhhhhh……..quiet …I am still eating this!! Easy Peasy!! Manly, don’t wait!

Guinness and Cheddar Dip

Servings: about 4 cups

Ingredients:

8 ounces cream cheese, softened

2 and 1/2 cups sharp cheddar cheese, grated

1 teaspoon Dijon mustard

2 tablespoons half-and-half

1/4 cup Guinness

2 or 3 scallions, chopped

1 teaspoon garlic, minced

2 tablespoons parsley, chopped

Sea salt and pepper, to taste

Instructions:

1. In the bowl of your blender or food processor, combine the cream cheese, cheddar, mustard, and half-and-half.  Pulse until smooth.

2. With the food processor running, slowly pour the Guinness down the feeder and blend until combined.

3. Add the scallions, garlic, parsley, and salt and pepper (to taste).  Blend until thoroughly mixed.

4. Transfer to a bowl, cover, and chill at least for one hour prior to serving.
Bon Appétit!

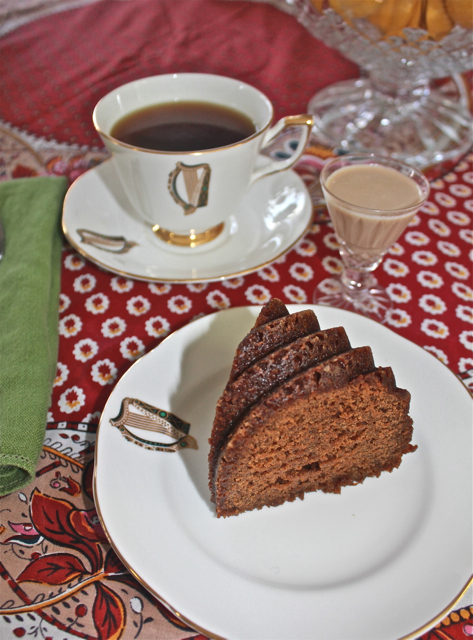
Guinness Molasses Cake…….perfect for Leprechauns!

It’s that time of year again when you pull out your green garb and toast the Leprechauns! This year I went a different route and subjected my friends to the Guinness Menu!! But let’s start with dessert. Guinness Molasses cake……sounds healthy right! You’d be darn tootin! It was like a spicy ginger type of cake and for goodness sake top with some Whipped Cream and home-made Bailey’s Irish Cream! YUM!

Guinness and Molasses Cake


2 cups white flour
1 cup Guinness
1 cup molasses
1/2 cup sugar
1/3 cup unsalted butter, softened
1 egg
2 teaspoons cinnamon
1 teaspoon baking soda
a pinch of salt

Preheat the oven at 350˚.
Mix the baking soda in the Guinness. Let rest for 5 minutes.
Whisk together the butter and sugar until smooth.
Add the Guinness, molasses, egg, cinnamon and salt.
Stiff in the flour a bit at a time, whisking constantly.
Butter a 8×8 mold and pour in the mixture.
Cook for 35-40 minutes. Leave to cool at least 15 minutes. Top with whipped cream and Baileys!

Bon Appétit!

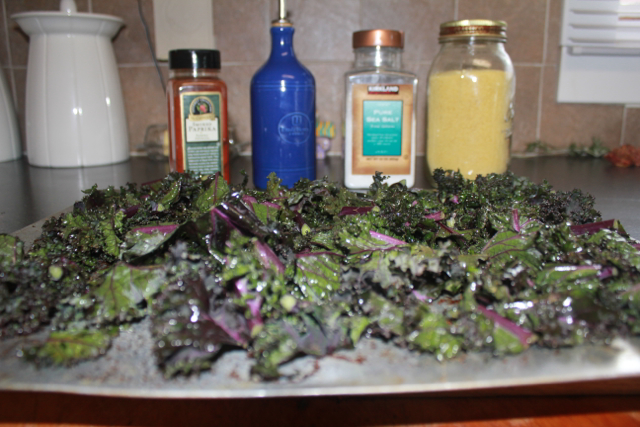
Kale Chips……..mighty crunchy!

Kale chips certainly doesn’t sound that appetizing unless you have a penchant for the ultra healthy. These are Super easy and I found most recipes only added salt and vinegar. But I wanted to try something a little more adventurous and just used my favorite home made potato chip spices to spice these fine little ditties. These chips are much easier than the spud variety I might add and obviously less fattening. But go ahead…..you know you want to try these.

Here’s all you do:

1 bunch of Kale

Olive oil – depending on the size of the head of kale, 1/8-1/4 cup to really toss well

salt/pepper/paprika/nutritional yeast – enter at your own risk

Mix well and place chopped kale into a lightly greased tray and bake at 400˚ oven for 18-20 minutes. Depending on how “airy” you want these to be.

Be prepared to watch them instantly disappear. Honest!

Photos at :www.chanteusedesigns.com/blog

Bon Appétit!

Cranberry Bliss Bars……crazy good!

So good…..so easy……not much else to say!!!! Dig in! For me, these are ultra rich……..so get that espresso machine fired up and prepare yourself!!

Here’s all you do:

Cranberry Bliss Bars

Blondie Layer:
3/4 cup (1 1/2 sticks) salted butter, cubed
1 1/2 cups packed light brown sugar
2 large eggs
3/4 teaspoon vanilla extract
2 1/4 cups all-purpose flour
1 1/2 teaspoons baking powder
1/4 teaspoon salt
1/8 teaspoon ground cinnamon
1/2 cup dried cranberries
6 ounces white baking chocolate, coarsely chopped

Frosting:

1 package (8 ounces) cream cheese, softened
1 cup powdered sugar, sifted
6 ounces white baking chocolate, melted
1/2 cup dried cranberries, coarsely chopped
1 teaspoon grated orange zest (not optional for me)

Directions:

1. Preheat the oven to 350˚.  Spray a 9×13-inch baking dish with nonstick spray or line with parchment paper.

2. For the blondie layer: In a medium bowl, melt butter for one minute in the microwave or until melted; stir in brown sugar. Pour the butter and sugar into a large bowl and let cool to room temperature. Use an electric mixer to beat in the eggs and vanilla. In a separate bowl, whisk together the flour, baking powder, salt and cinnamon; gradually add the dry mixture to the butter mixture. Stir in the cranberries and chopped chocolate (batter will be thick). PS I should have chopped the white chocolate more, I thought the big chunks might be yummy, but for me personally a bit too much. Chop pretty fine.   ……just sayin…….;-)

3. Spread the blondie batter into the prepared pan. Bake for 18-21 minutes or until a toothpick inserted near the center comes out clean (do not overbake). Cool completely on a wire rack.

4. For the frosting: In a large bowl, sift your powdered sugar a few times to ensure no lumps. Use an electric mixer to beat the cream cheese and powdered sugar until combined. Gradually add half of the melted white chocolate; beat until blended. Frost brownies. Sprinkle with chopped cranberries. Drizzle with remaining melted white chocolate. Let the frosting set (speed this up by throwing them into the fridge) then cut into bars, squares or triangle-shapes. Store in the refrigerator until ready to serve.

Again, what can I say…..delicious, decadent, deadly good, don’t wait!

Bon Appétit!

Belgian Waffles….for Valentines Day ;-)

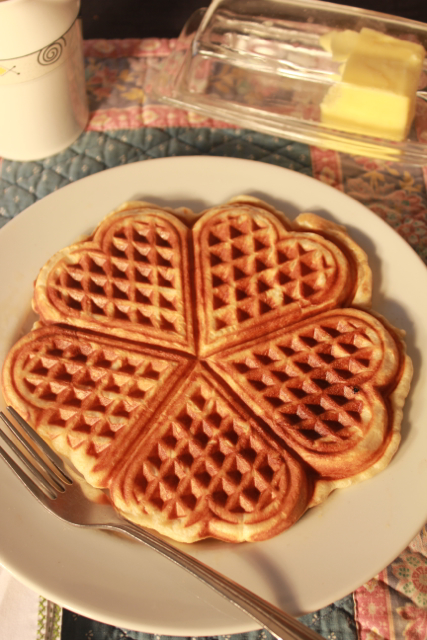
Here is something simple to start your Valentines day!  I had been wanting to try this specific recipe with my cute little valentine waffle iron. It had a few new ingredients than your average waffle mix and it looked like it might be lighter and tastier. Well my results turned out a little bit different from what I expected. But it may have only been something minor; not sure if my yeast is going off. It’s the only thing I could think of as it foamed up, but not that much. My famous bread yeast batches can look like a bloody good stout beer foam. This barely had 1/2″ of foam on top. My batter was super thick and super gooey! Hmmm, don’t think that was how it was suppose to turn out, but they still tasted mighty yummy. You have to wait an hour for the batter to settle, so if you are famished you are going to have to distract yourself until you can pour this onto your plate. Happy Valentines Day to all.

Here’s all you do:

Classic Belgian Waffles

1 ½ teaspoons active dry yeast
1 cup very warm water, 110˚-115˚
¼ cup sugar
3 cups all-purpose flour
½ teaspoon salt
1 cup whole milk
1 stick unsalted butter, melted
2 large eggs, separated
½ teaspoon pure vanilla extract
powdered sugar, for dusting, if desired
butter and maple syrup, if desired

1. In a small bowl, dissolve the sugar in the water. Add the yeast and stir to combine; let mixture sit until foamy, about 5 minutes.

2. In a large bowl, stir the flour with the salt. Whisk in the yeast mixture, milk, butter, egg yolks and vanilla until smooth.

3. In a medium bowl, beat the egg whites with an electric mixer until soft peaks form. Fold them into the batter and let stand for 1 hour.

4. Preheat the oven to 225°. Heat and grease a Belgian waffle iron. Pour the batter into the iron and cook until the waffles are golden, 3-5 minutes, depending on your waffle maker. Transfer the waffles to the oven. Repeat with the remaining batter. Dust the waffles with powdered sugar or serve with butter and warm syrup. You can also top these waffles with fresh fruit.

PS It’s not letting me upload photos (my mistake for not paying attention to sizing them properly when I got my new camera) but you can see the photos on my website later at www.chanteusedesigns.com

Bon Appétit

Easy Banana bread with some healthy ingredients.

Banana Bread Loaf

Banana Bread Loaf

You can never go wrong with banana bread and I bet it is one of Starbucks best sellers. It’s quick and easy and I try to make any sweet dessert a bit healthier. Hence I have begun adding flax seeds and pumpkin seeds whenever it seems like a good fit. It tastes fabulous with the seeds in it. Normally I would add walnuts, but the seeds are more subtle and really compliment the tender and humble banana. My new addition from here on out.

This recipe calls for 1/2 cup of sour cream and it has to be the magic ingredient for its delicious and moist texture. I got this recipe from Eat Yourself Skinny Blog: (http://www.eat-yourself-skinny.com/2012/01/grandmas-banana-bread.html)

Great for tea time, breakfast or dessert. Bananas…….always a good thing. And hey, there is nothing sexy about photographing Banana bread. Period.  So while I know I have a lot to learn in photographing my recipes……I bet even Leibovitz has much luck with banana bread! But trust me, it’s delicious. No really!

Here’s all you do:

BANANA BREAD WITH SOUR CREAM

Ingredients:

1/2 cup (1 stick) light butter, softened 
1 cup sugar (I stay away from Splenda completely)
2 eggs
1 tsp. vanilla
1/2 cup light sour cream
1 cup mashed bananas (about 2 bananas)
1 1/2 cups all-purpose flour
1 tsp. baking soda
1/2 tsp. salt
1 Tablespoon flax seeds
1/2 cup pumpkin seeds

Preheat oven to 350 degrees F.  Mix together Flour, baking soda and salt in a separate bowl and set aside. In a medium to large mixing bowl mix together softened butter and sugar until well combined.  Then add in eggs and mix well.  Next add in vanilla, sour cream and mashed bananas then, while the mixer is on, slowly add the flour mixture until completely combined, scraping the sides and the bottom.

Meanwhile, grease your loaf pan and lightly flour so that your bread won’t stick.  If using one 9×5 loaf pan, bake bread for about one hour.  If using two smaller loaf pans, bake bread for about 45 minutes. Mine cooked for an hour to perfection!

Serve with friends and good cheer!

Bon Appétit!

Champagne Vinaigrette a winner any way!

Champagne Salad

Champagne Salad

Don’t know why I have never made Champagne Vinaigrette before, but that is certainly going to change in 2012. Wow, wow what took me so long. I guess I just really didn’t think alcohol….salad……alcohol?…in a salad dressing? So I just never really went down that road. But then of course I realized…….I read that wrong. It wasn’t Champagne……it was champagne vinegar. Uh-oh. Well, guess what?  I had some Champagne on hand and thought it sounded Great! It is not something you can taste (the alcohol), but it is such a vibrant and fresh tasting dressing. Pow! (wonder what the vinegar version tastes like?) And it was a BIG HIT! I made a simple salad of romaine lettuce, cranberries, bleu cheese and candied walnuts and topped it off with this zippy, incredible dressing! Don’t miss out. Save a 1/4 cup of your next bottle of Champagne and treat yourself. Or you can make it with Champagne vinegar and maybe not dance through dinner! But do give it a try with the real deal. I got this recipe from  epicurious.com.

Here’s all you do:

  • 1 garlic clove, finely chopped
  • 2 tablespoons dijon Mustard
  • 1/4 cup champagne vinegar (oooops;-)
  • 2 tablespoons fresh lemon juice
  • 2 tablespoons honey
  • 2 or 3 dashes hot sauce (definitely 3)
  • 1/2 teaspoon salt
  • 1/2 teaspoon freshly ground black pepper
  • 1/2 cup extra virgin olive oil

Whisk together all the ingredients.  Pour over a lovely salad………then wait for applause! No really!

Bon Appétit

New Years Bundt cake…..a favorite with some new tips and thanks!

Fancy Bundt tips

Fancy Bundt tips

I wanted to make something special for the gals and couldn’t decide whether my favorite Almond cake or the Sour Cream Coffee Cake from Lisa Dupar’s were my 2011 favorite cakes. I decided on the bundt just because it would be visually a bit more elegant for the ladies but I think I used the wrong bundt pan and wanted to share. I had, for about a year after buying this fancy bundt pan, not had much success with getting the cakes out of this fancy pan. But with a tiny bit of perseverance, it paid off. Except not exactly for this recipe. It looked lovely, but the cake is so dense and moist that the cake was too big for this pan and didn’t cook as evenly or as effectively. The filling became too thick and hard packed. And this is one DELICIOUS cake, so it’s always safer to find the right pan. Who wants to throw out all that work and good ingredients!

So, a simple plain ol bundt cake pan is the perfect pan for this cake. Although it looked lovely, it was not as smooth. And my tips for getting it to turn out so effortlessly with all those lovely ridges is to oil and flour every single crevice to make sure it lifts right out and keeps that nice design.

Here’s Lisa’s recipe:

Pecan Sour Cream Coffee Cake by Lisa Dupar

2 3/4 cups of sugar

16 Tablespoons unsalted butter

2 eggs

2 cups sour cream

1 tablespoon vanilla extract

2 cups flour

1 Tablespoon baking powder

1/4 teaspoon salt

2 cups chopped pecans

1 Tablespoon cinnamon

Powdered sugar for dusting

Preheat oven to 350˚. In the bowl of a standing kitchen mixer with whip attachment, at medium speed, cream together the sugar and the butter. Slowly add the eggs one at a time, scraping the bottom of the bowl. Add the sour cream and vanilla. In a separate bowl, sift together the flour, baking powder and salt. Add the dry mixture to the egg-sour cream mixture and mix until just combined. In a separate bowl, mix together the remaining 3/4 cup sugar, pecans and cinnamon.

Grease and flour a standard Bundt pan. Alternate pouring in the batter, the cinnamon nut mixture, and then the batter starting and ending with the batter. Bake one hour. (Mine 55 minutes) Turn out onto rack to cool.

When cake is completely cooled, dust with powdered sugar.

Wanted to also thank all of my wonderful customers and guests of 2011 for making it such an amazing and fantastic year! Thanks for all of your support and may your 2012 be magical.

All for now bakers!

Bon Appétit!

Potato Parmesan Soup with Pesto

Potato Parmesan Pesto Soup

Potato Parmesan Pesto Soup

We all know what a soup fan I am and this is one of those soups that is pure comfort. It was so much better than I expected because potato soup …..is well…….some of my old versions anyway tended to get gluey or just way too much potato-y-starchy. This has just the right amount of stock, potato, milk/cream and that dash of pesto sends it to another category. I have finally found my favorite Potato Soup! I got this Potato Parmesan soup recipe from Tasty Kitchen! Thanks ever so much.

Tis the season for warmth and hearty dishes. This dish is a delight on its own but I am thinking some home made rolls would be the perfect match. Stay tuned.

Here’s all you do:

Potato Parmesan Soup with Pesto

Ingredients:
1 Tablespoon extra virgin olive oil
1 whole medium shallot, diced
1 whole large garlic clove, minced
5 whole medium potatoes, peeled and cubed (I like tiny bits of skin on, gives nice flecks…..just sayin!)
4 cups chicken or vegetable stock
1 bay leaf
1 cup milk
1/2 cup Parmesan cheese, grated
Salt and pepper, to taste
Pesto

Directions:
In a medium stockpot, drizzle 1 tablespoon of olive oil and heat to medium. When warm, add shallot and saute until translucent, about 3 minutes. Add garlic and cook for an additional minute. Add potatoes, stock, and bay leaf. Bring to a boil and then simmer until the potatoes are tender, about 15 minutes. Using an immersion blender, puree soup to desired texture. Add milk and bring back to a low boil. (My potatoes took longer than 15 minutes, so it really heated up and hence I didn’t add the milk until I turned off the heat. For other reasons)  Turn off heat and remove bay leaf. Stir in grated Parmesan.  If you use a blender rather than an immersion blender, make sure soup is cool before blending it to prevent a kitchen explosion. Taste soup at this point and add salt and pepper to taste (the soup should be plenty salty from the Parmesan cheese). (Kath here: Since you are only using 1/2 cup cheese I personally found that it definitely needed salt;-))  If you don’t serve immediately, reheat soup before serving.

Place a large dollop (about 1 tablespoon or more) of pesto into each serving bowl and swirl into the soup. Delightful! Really the nice surprise and a change from the usual dollop of sour cream.

Toast to good friends and enjoy the New Year with shared yummy dishes!

Bon Appétit!

Coffee Liqueur Cheesecake…..a Christmas treat!

Baileys Cheesecake

Baileys Cheesecake

Once upon a time in a land far, far away……I lived in Sydney, …….Australia (is there any other??) where I discovered this lovely cheesecake. It was so popular I actually sold it to restaurants. It’s been years since I have made this lovely dessert. But the recipe kept jumping out at me when I was moving boxes this week. I had many copies tucked into a cookbook type notebook of mine and every time I turned around lately, there was the typed out recipe. (Yes, Typed out as in non electric, register type keys, align and insert paper and turn knob.) Ok, you get it. On with the story.

Hmmmm ……Didn’t I just put you back into your place? And yet I would find another copy staring me in the face. Hmmm, note from the universe…… this must be the dessert I should make for Christmas this year. And so I dusted off my recipe and set about to make this fabulous, easy and elegant dessert.

Here’s all you do:

CRUST:

1 package of sweet biscuits, graham or oreo cookies. I used 28 oreo cookies

1/2 cup butter + 1 Tablespoon

FILLING:

375 grams of cream cheese (I used two 8 oz packages softened)

3/4 cup sugar (If you like is super sweet, add more)

1 Tablespoon flour

3 eggs

3/4 cup sour cream

1 Tablespoon lemon juice

60 grams dark chocolate

1 Tablespoon instant coffee

1 Tablespoon Tia Maria or Kahlua (I used Baileys, NOT as sugary)

1 Tablespoon water (Don’t add if you are not adding coffee)

1 egg yolk (add lastly and whisk briskly before egg can cook)

CREAM:

1 Tablespoon instant coffee (left plain this time so I didn’t add)

1 teaspoon hot water (don’t add unless adding coffee)

1 cup heavy whipping cream (my personal fav)

1 Tablespoon sugar (2 Tablespoons if using Baileys or less sugary liqueur)

CRUST: Crush biscuits and add melted butter mixing well. Press on base and sides of a 8 inch spring form pan.

FILLING: Beat cream cheese until soft. Combine sugar and flour into cheese and beat well. Beat in eggs, sour cream and lemon juice. Pour half into the crust. Put roughly chopped chocolate, coffee, liqueur, water, and lightly beaten egg yolk into top of a double boiler, keep heat on medium as to not over cook. Stir until chopped chocolate melts and mixture becomes thick. Remove from heat, cool slightly.

Swirl half of chocolate mixture through cheesecake in crust. Top with other half of cheesecake mixture and swirl the rest of chocolate mix on second half. Don’t over swirl. Bake at 325˚ for about one hour. Refrigerate.

CREAM: Dissolve coffee in hot water. Put cream, coffee and sugar in bowl. Refrigerate for 30 minutes. Beat until thick and top cheesecake!

Cheesecake

Cheesecake

I sometimes sprinkle a little cocoa, finely ground coffee, cinnamon or even nutmeg (depending upon what liqueurs I choose). Dusting it makes such a simple compliment!

Enjoy and definitely put on some Jackie Evancho……perfect for the season.

Bon Appétit!

Chocolate Zucchini Cake…….DE-lish!

Zucchini Cake

Zucchini Cake

I was going to make a friend another batch of her favorite brownies for her birthday but something caught my eye in the fridge. I had purchased those zukes for a lovely light stirred up pasta dish. But then I remembered how sneaky putting those vegetables into our desserts make it a less guilty pleasure. So off I set to find a yummy new dessert. AND this was such a moist and pleasant surprise. You can still see the green flecks in my chocolate cake, but most of the cakes I saw online you couldn’t see them.  Maybe I didn’t grate the zucchini enough but it was a humdinger melt in your mouth cake.

Here’s all you do:

Chocolate Zucchini Cake

adapted from Saveur

serves 8-10

Ingredients:

  • 2 medium zucchini, trimmed and grated (I grated mine on the medium holes of a box grater)
  • 9 tablespoons of unsalted butter, at room temperature, divided
  • 2-3/4 cup flour
  • 1/4 cup unsweetened cocoa, sifted
  • 1-1/4 teaspoon baking soda
  • 1 teaspoon salt
  • 1-1/2 cup sugar
  • 1/2 cup vegetable oil
  • 2 eggs
  • 1 teaspoon vanilla extract
  • 1/2 cup buttermilk * (you can sub yogurt)
  • 1/4 cup confectioners’ sugar

Working in batches, put a small mound of the grated zucchini in center of a large square of double-layer cheesecloth (I used a thin tea towel).  Gather corners together and squeeze out as much water as possible from the zucchini.  Transfer zucchini to a bowl and set aside.  (I had about 2 cups of this squeezed zucchini. Do not obsess about the amount, though.  This is a very forgiving recipe when it comes to the amount of zucchini.)

Preheat the oven to 325 degrees F.  Butter a deep 9″ cake pan with 1 tablespoon of the butter. Sift flour, cocoa, baking soda and salt together into a mixing bowl and set aside.

Beat together the remaining 8 tablespoons of butter and sugar in a large bowl with an electric mixer on medium speed until fluffy, 3-4 minutes.  Add oil, beating well. Beat in one egg at a time, add vanilla, reduce speed to low and beat in flour mixture and buttermilk in 3 alternative batches.  Stir in reserved zucchini.

Pour batter into prepared pan and bake until toothpick inserted in center comes out clean, about 55 minutes to 1 hour.  Remove from oven and set aside to cool for 15 minutes.  Invert onto a rack to cook completely. Dust with confectioners’ sugar.

I served mine with coffee ice cream but it was so moist that it needed NOTHING, not even confectioner’s sugar or icing. Great for kids who won’t eat their veggies.

Bon Appétit.

My new favorite…..vegetarian curry. All the right warmth.

Veggie Curry

Veggie Curry

Nothing says warm me up like a Curry with coconut milk and all the right fillings on a cold and windy rainy night. This is truly a delicious meal even if my photo suggests otherwise! This recipe calls for chicken, chicken broth and fish sauce, of which I omitted and used veggie broth and it still would have fooled the best carnivore. Other than a lot of peeling and chopping, there is nothing to it. Just make sure you have some good curry spices and fresh ginger (of which I probably over indulge in). It’s a crowd pleaser and serves a crowd. Don’t miss out on this one if you are a curry fan. You’ll be adding it to your fav’s in no time. I have made this a few times and the only thing I am going to try in the future is swap the amounts of milk and coconut milk around. Just to see if it’s creamier or more subtle! (1 can coconut milk/to 2 cups regular milk-so I will swap) ;-)

Here’s all you do:

Makes about 8 servings
  • 1 x 2-1/2 – 3 lb. chicken, cut up or you can buy pre-cut pieces at the store. Or if you prefer, use all breasts or thighs depending on your preference.  You can also include a few sliced up boneless breasts or thighs to add towards the end if you want to increase the protein and have some boneless bites for everyone.  (For a vegetarian version, use 1 or 2 tubs of firm tofu – see notes below)
  • 7-8 medium carrots, peeled, trimmed and cut into about 2″ lengths
  • 6 small russet potatoes, peeled and cut into about 2″ large pieces, with larger pieces cut in half
  • 4 medium sweet potatoes, peeled and cut into similar 2″ large pieces
  • 1 large onion, cut into wedges
  • 3-4″piece of ginger, bruised with the back of your knife
  • 3 cloves garlic, finely chopped
  • 2 shallots, thinly sliced
  • 1 x 32 oz. carton, or 4 cups of low-sodium chicken broth, or homemade (Or you can use veggie stock)
  • 2 cups organic milk of your preference
  • 1 x 13.5 oz. can coconut milk
  • 2 – 3 Tbsp. Vietnamese curry powder
  • 2 Tbsp. Fish sauce
  • 1 Tbsp. kosher salt, more to salt and pepper the chicken pieces
  • 1 – 2 tsp. sugar
  • Cooked rice noodles or baguette or french bread for serving, actually naan would be great
Beginning prep:1.  Break down your chicken into 2 breasts, 2 thighs, 2 drumsticks and 2 wings,  and then break everything down a little further.  Cut each breast through the bone into thirds, each thigh in half, each drumstick in half, and then divide each wing at the joints.  This is best done with with a big cleaver, but if you don’t have one, it’s probably best to leave the drumsticks and thighs whole as the bones are bigger and thicker.  If you are adding a few additional boneless thighs or breasts, slice them into bite-sized pieces and set aside until later in the cooking process.  Season the chicken pieces with salt and pepper.2.  Prep all your vegetables as described above in the ingredient list.Making the curry:

3.  In a large pot or dutch oven, drizzle a little canola or vegetable oil and heat over medium high heat.  Add sliced shallots and garlic and saute for a minute or so until fragrant.  Add 2 Tbsp. curry powder and saute for about 30 seconds.

4.  Push everything to the side and add the chicken pieces and brown for a few minutes on each side in two batches.  Set the chicken aside for now.

5.  Add the sliced onions to the pot and saute for a minute, and then add the chicken broth, chicken pieces back to the pot, the piece of bruised ginger, the coconut milk and let it all come to a gentle boil.

6.  Add fish sauce and 1 Tbsp. salt, the potatoes, carrots and turn the heat down to medium/low and bring everything to a simmer for about 10 minutes.

7.  Taste the curry and if you want a stronger curry flavor, add a little more, up to another tablespoon.  Add 1 tsp. of the sugar for now. Don’t worry if it tastes a little spicy yet as you’ll add a little milk at the end still.  Add the sweet potatoes and let everything simmer for another 10 minutes.

8.  Turn the heat down to low to a very gentle, low simmer, and add the milk and stir well. Let everything simmer on low heat for another couple of minutes or so.   If you like, add another teaspoon sugar or more fish sauce to balance the flavors to your liking.

Serve with Vietnamese french bread, a piece of baguette or french bread, or over rice noodles.  This tastes even better the next day.

For a vegetarian version and if you like tofu:

If you want to make this vegetarian, you can add cubes of pan-fried tofu.  Remove the tofu from the package and let it sit in a colander for a while and drain.  Dry it off as much as possible with paper towels. Slice into smaller pieces – thirds or quarters depending on the size of your tofu. Heat about an inch of oil in a deep skillet over medium high heat or even a pot to reduce oil splatter.  Once it’s hot (try the chopstick method – put the tip of a chopstick into the oil and if bubbles gather around it, it’s ready), add the slices of tofu and brown on all sides and set aside over a rack to drain off any excess oil.  Then slice into large cubes.  If you have an Asian grocery store in your area, you can probably find pre-fried tofu, which is great because it makes things a little easier.

Follow steps 1 through 3, omit step 4, and pick up with step 5 again.  Replace chicken broth with veggie stock or just water, and omit fish sauce.  You may end up increasing the curry powder or salt a little to make up for the fish sauce.  Add the tofu cubes with the sweet potatoes in step 7.

I have only ever served mine over rice and it was perfect. It keeps well and won’t disappoint.

Bon Appétit!

Follow

Get every new post on this blog delivered to your Inbox.

Join other followers: